

Over my 12 years of coaching clients across India—from busy corporate executives in Bengaluru to young homemakers in Delhi—I have tested dozens of workout trends. HIIT workouts, functional training, kettlebell flows, traditional weightlifting—you name it, I have put clients through it. Yet, whenever someone walks into my studio feeling completely overwhelmed by complex gym routines, I always bring them back to an ancient, time-tested sequence: Sun Salutations.
There is something extraordinarily powerful about moving through these movements. In my early years as a trainer, I treated it purely as a dynamic warm-up. But after watching hundreds of clients transform their physical posture, stamina, and mental calm through this single flow, my perspective shifted completely. The full spectrum of surya namaskar benefits goes far beyond basic flexibility. It is an all-in-one system that builds functional strength, burns calories, stimulates internal organs, and resets a stressed nervous system.
If you are new to fitness or returning after a long break, you do not need expensive gym equipment or complicated machinery to transform your health. In this comprehensive guide for iFitGuide, I am breaking down the science, the exact movement mechanics, and the proper technique so you can build a safe, consistent practice right from your living room.
What Is Surya Namaskar?
At its core, Sun Salutation is a dynamic sequence of 12 interconnected postures performed in a continuous, rhythmic flow synchronized with deep breathing. The Sanskrit word Surya translates to Sun, while Namaskar means salutation or reverent greeting. Historically, this practice was designed to pay homage to the solar energy that sustains life on Earth, but physically, it serves as a complete body conditioning system.
What makes Surya Namaskar yoga unique compared to isolated gym exercises is its fluid harmony between movement and breath. Every forward bend is paired with an exhalation, while every backbend or spinal expansion is paired with a deep inhalation. This specific breathing rhythm acts as an internal pump, encouraging oxygenated blood to circulate through every joint, muscle, and organ system.
When you look at the sequence, you will notice that it alternates between bending the spine forward and arching it backward. This constant flex and extension keeps your vertebral column supple, counteracting the hours we spend slouched over desks and mobile screens. In my experience with coaching beginners at iFitGuide, mastering these surya namaskar poses provides a solid foundational base that makes every other physical activity—from running to weight training—significantly safer and more efficient.
For a deeper understanding, explore scientific research on yoga practice published on PubMed, which examines the potential benefits of structured yoga practice for metabolic health, cardiovascular fitness, and overall well-being.
Top Surya Namaskar Benefits
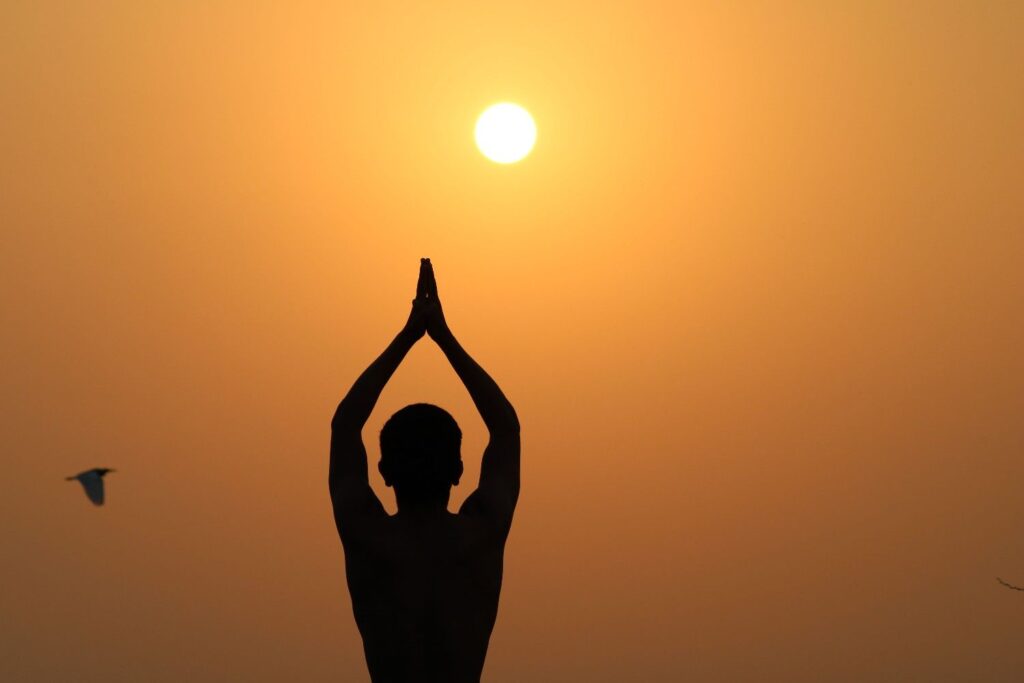
When clients ask me why they should prioritize this sequence over other exercises, I tell them that few practices offer such comprehensive return on investment. Whether you are aiming to shed extra body weight, fix poor posture, or calm an overactive mind, the physical and psychological rewards are undeniable. Here is how practicing this sequence regularly creates profound changes across your body.
Weight Loss & Fat Burning
One of the most frequent questions I receive from new clients is whether a gentle-looking flow can actually help with weight management. The short answer is an absolute yes. While it may look smooth and relaxed when performed by an experienced practitioner, performing dynamic rounds at a brisk pace creates a significant cardiovascular demand.
The continuous transition between standing, plank, lower-body lunges, and floor postures elevates your heart rate into an effective fat-burning zone. When performed continuously for 15 to 20 minutes, the energy expenditure rivals moderate-intensity jogging or cycling. Beyond immediate calorie consumption, the continuous contraction of large muscle groups—like your quadriceps, glutes, core, and back muscles—builds lean muscle mass over time. A higher proportion of lean muscle naturally boosts your resting metabolic rate, meaning your body burns more calories even when you are resting.
If your primary fitness goal is shedding body weight, combining your yoga flow with structured walking for weight loss creates a sustainable, low-impact exercise combination that protects your joints while maximizing daily calorie burn. Furthermore, checking the calorie burn for daily physical activities confirms that high-tempo bodyweight movements effectively contribute to long-term body re-composition. The key lies in consistency and gradual pace acceleration, ensuring that the benefits of surya namaskar accumulate over weeks and months of steady practice.
Flexibility & Strength
In my coaching career, I have met countless beginners who avoid yoga because they believe they are “not flexible enough.” That logic is completely backward. You do not practice because you are flexible; you practice to become flexible. The dynamic stretching inherent in every movement systematically lengthens tight hamstrings, calves, hip flexors, and shoulder girdles.
Unlike static stretching—where you hold a single position while cold—dynamic flows stretch your muscles while they are actively contracting and warming up. This approach safely increases range of motion without over-stretching ligaments. Simultaneously, holding positions like the Plank, Eight-Limbed Pose, and Cobra Pose builds functional upper-body and core strength. You are supporting your own body weight against gravity, which strengthens your wrists, triceps, shoulders, and deep abdominal stabilizer muscles.
These physical gains carry over directly into everyday life. You will find it easier to lift heavy grocery bags, climb stairs without knee pain, and maintain upright posture during long work hours. The compound physical surya namaskar benefits form the bedrock of functional fitness for practitioners of all ages.
Stress Relief & Mental Clarity
Physical health is only half the equation. In our modern work environment, mental fatigue and chronic stress are nearly universal issues among the professionals I train at iFitGuide. This is where synchronized breathing delivers remarkable results.
When you coordinate your inhalations and exhalations with physical movement, you force your mind into the present moment. You cannot dwell on work emails or personal worries while keeping track of your breath and alignment in a complex sequence. This focused mindfulness shifts your autonomic nervous system away from the sympathetic “fight-or-flight” response and into the parasympathetic “rest-and-digest” state.
Cortisol levels drop, heart rate stabilizes, and mental clutter clears. Many of my clients report feeling a serene yet energized state of mind immediately after completing their morning rounds. As noted in the Mayo Clinic Guide on yoga for stress management, mind-body practices play a vital role in reducing anxiety, lowering blood pressure, and managing stress-related health complications. The mental benefits of surya namaskar are often what keep practitioners coming back to their mats day after day.
Improved Digestion & Circulation
If you suffer from sluggish digestion, bloating, or poor circulation, the internal massage provided by this flow can be transformative. Forward-bending postures compress the abdominal cavity, gently massaging the stomach, liver, intestines, and kidneys. When you move out of the forward bend into a backbend, that compression releases, flooding the digestive organs with fresh, oxygenated blood.
This mechanical compression and release stimulates peristalsis—the natural wave-like muscle contractions that move food through your digestive tract. Over time, regular practice helps relieve constipation, improves nutrient absorption, and reduces chronic abdominal discomfort.
Simultaneously, the continuous inversion and elevation of your heart relative to your head enhances blood flow throughout your entire vascular network. Improved circulation delivers vital nutrients to tissues, accelerates metabolic waste removal, and gives your skin a healthy, natural glow. If you are working to reduce belly fat naturally, optimizing your digestive efficiency and blood flow through these movements provides crucial internal support for your external physical efforts.
The 12 Steps of Surya Namaskar (Step by Step)
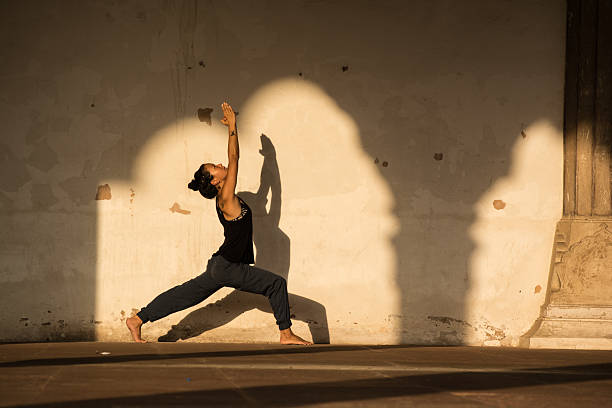
To help you build a solid foundation, let us break down the standard Surya Namaskar 12-step sequence. Remember that one full round consists of performing these 12 positions twice: once leading with the right leg during the lunge steps, and once leading with the left leg.
When you learn the step-by-step Surya Namaskar flow, focus initially on getting the physical alignments correct before worrying about perfect breath timing. Speed comes naturally once muscle memory takes over.
Step 1: Pranamasana (Prayer Pose)
- Breath: Exhale
- Movement: Stand upright at the front edge of your mat with your feet placed together or hip-width apart for better balance. Distribute your weight evenly across both feet. Bring your palms together in front of your chest in a respectful prayer position. Relax your shoulders down and away from your ears, lengthen your neck, and gaze softly straight ahead.
Step 2: Hasta Uttanasana (Raised Arms Pose)
- Breath: Inhale
- Movement: As you inhale deeply, raise your arms upward and sweep them overhead. Keep your biceps close to your ears and your palms facing forward or toward each other. Softly arch your spine backward, pushing your hips slightly forward while engaging your glutes to protect your lower back. Reach up through your fingertips rather than simply dumping weight into your lumbar spine.
Step 3: Uttanasana (Standing Forward Bend)
- Breath: Exhale
- Movement: Breathe out slowly as you hinge forward from your hip joints, keeping your spine straight and chest open for as long as possible during the descent. Bring your hands down to the floor alongside your feet. If your hamstrings feel tight, bend your knees generously so your palms or fingertips can comfortably touch the mat.
Step 4: Ashwa Sanchalanasana (Equestrian Pose)
- Breath: Inhale
- Movement: Inhale deeply as you step your right leg far back, landing on the ball of your right foot. Drop your right knee gently down to the mat and uncurling your back toes. Bend your left knee at a clean 90-degree angle so your ankle sits directly underneath your knee. Press your hips down toward the floor, roll your chest open, and lift your gaze slightly upward.
Step 5: Dandasana (Plank Pose)
- Breath: Retain breath / Exhale
- Movement: As you transition, step your left leg back to meet your right leg. Bring your body into a straight, rigid line from your crown to your heels, similar to the top of a push-up. Stack your shoulders directly over your wrists, spread your fingers wide to protect your joint structures, engage your core deeply, and prevent your lower back from sagging.
Step 6: Ashtanga Namaskara (Eight-Limbed Pose)
- Breath: Exhale
- Movement: Gently lower your knees down to the mat. Lower your chest and chin down between your hands while keeping your hips elevated in the air. In this position, exactly eight points of your body touch the ground: two feet, two knees, two hands, chest, and chin. Keep your elbows tucked in tightly beside your ribs.
Step 7: Bhujangasana (Cobra Pose)
- Breath: Inhale
- Movement: Slide forward flat onto your abdomen, uncurl your toes, and press the tops of your feet firmly into the floor. Inhale as you gently lift your chest off the mat using your upper back muscles. Keep your elbows slightly bent and hugging your sides, relax your shoulders away from your neck, and open your heart center forward.
Step 8: Adho Mukha Svanasana (Downward-Facing Dog Pose)
- Breath: Exhale
- Movement: Tuck your toes under, exhale deeply, and lift your hips high toward the ceiling, creating an inverted “V” shape with your body. Press firmly through your palms, broaden your upper back, and press your heels down toward the floor. Relax your neck so your head hangs naturally between your upper arms.
Step 9: Ashwa Sanchalanasana (Equestrian Pose)
- Breath: Inhale
- Movement: Inhale as you step your right foot forward between your hands. Place your right foot precisely where your right hand sits, keeping your right knee bent at a 90-degree angle. Lower your left knee to the floor, press your hips forward and down, and open your chest forward as you gaze slightly upward.
Step 10: Uttanasana (Standing Forward Bend)
- Breath: Exhale
- Movement: Exhale as you step your left leg forward to join your right foot at the front of your mat. Keep your feet together or hip-width apart. Fold forward from your hips, bringing your torso toward your thighs. Allow your head and arms to hang heavy toward the floor, keeping a slight bend in your knees if your hamstrings feel tight.
Step 11: Hasta Uttanasana (Raised Arms Pose)
- Breath: Inhale
- Movement: Inhale deeply as you sweep your arms forward and raise your torso back up to standing. Reach your hands high overhead, keeping your biceps beside your ears. Softly arch your upper back, gently pressing your hips forward while keeping your core engaged.
Step 12: Pranamasana (Prayer Pose)
- Breath: Exhale
- Movement: Exhale smoothly as you return your torso to a neutral vertical position and bring your palms together in prayer position in front of your heart space. Pause here for a moment, feel your heartbeat, notice the warmth generated throughout your body, and prepare for the second half of the round.
Surya Namaskar Poses Explained (with names)

Understanding the technical purpose of individual surya namaskar poses allows you to perform each posture with mindfulness and precision. Here is a quick reference breakdown of the names and primary physical benefits of each pose of Surya Namaskar:
| Pose # | Sanskrit Name | English Name | Primary Muscle Groups & Focus |
| 1 & 12 | Pranamasana | Prayer Pose | Postural awareness, mental grounding, chest alignment |
| 2 & 11 | Hasta Uttanasana | Raised Arms Pose | Abdominal stretching, shoulder mobility, upper back expansion |
| 3 & 10 | Uttanasana | Standing Forward Bend | Hamstring lengthener, spinal decompression, calf release |
| 4 & 9 | Ashwa Sanchalanasana | Equestrian Pose | Hip flexor opener, quadriceps strength, groin elasticity |
| 5 | Dandasana | Plank Pose | Core activation, shoulder girdle stability, wrist strength |
| 6 | Ashtanga Namaskara | Eight-Limbed Pose | Upper body push strength, spinal mobility, core control |
| 7 | Bhujangasana | Cobra Pose | Lower back strengthening, chest expansion, spine extension |
| 8 | Adho Mukha Svanasana | Downward-Facing Dog Pose | Full posterior chain stretch, upper body endurance, inversion blood flow |
When you practice the step by step surya namaskar flow consistently, these individual postures work synergistically. One posture prepares your body for the next. For instance, the deep hamstring stretch in Uttanasana makes stepping back into Ashwa Sanchalanasana smoother, while the upper-body engagement in Dandasana prepares your arms for the push required in Ashtanga Namaskara.
If you are looking to refine your form further, explore the Yoga Journal guide on Sun Salutation form and alignment for helpful tips on proper positioning and alignment. Mastering each individual pose of Surya Namaskar can help you perform the sequence safely and effectively.
Mantras for Surya Namaskar
Traditionally, Sun Salutations are not merely a physical workout; they are a spiritual and meditative practice. Performing your sequence while chanting or mentally reciting specific solar mantras adds a profound layer of mental focus, resonance, and breath control.
There is a dedicated solar mantra for Surya Namaskar assigned to each of the 12 steps. These Sanskrit chants invoke various solar attributes—such as energy, light, nourishment, and vitality.
Here are the 12 traditional mantras synchronized with the sequence:
- Step 1 (Pranamasana): Om Mitraya Namaha (Salutations to the friend of all)
- Step 2 (Hasta Uttanasana): Om Ravaye Namaha (Salutations to the radiant one)
- Step 3 (Uttanasana): Om Suryaya Namaha (Salutations to the illuminator)
- Step 4 (Ashwa Sanchalanasana): Om Bhanave Namaha (Salutations to he who bestows light)
- Step 5 (Dandasana): Om Khagaya Namaha (Salutations to he who moves quickly in the sky)
- Step 6 (Ashtanga Namaskara): Om Pushne Namaha (Salutations to the giver of strength and nourishment)
- Step 7 (Bhujangasana): Om Hiranyagarbhaya Namaha (Salutations to the golden cosmic self)
- Step 8 (Adho Mukha Svanasana): Om Marichaye Namaha (Salutations to the lord of the dawn)
- Step 9 (Ashwa Sanchalanasana): Om Adityaya Namaha (Salutations to the son of Aditi)
- Step 10 (Uttanasana): Om Savitre Namaha (Salutations to the benevolent creator)
- Step 11 (Hasta Uttanasana): Om Arkaya Namaha (Salutations to he who is fit to be praised)
- Step 12 (Pranamasana): Om Bhaskaraya Namaha (Salutations to the illuminator of the cosmos)
How should a beginner incorporate these chants? In my studio classes, I usually advise new students not to worry about chanting out loud during their first few weeks. Trying to remember physical posture alignment, breath transitions, and Sanskrit pronunciations all at once can be overwhelming!
Start by simply getting comfortable with the physical movement mechanics. Once the physical flow becomes second nature, you can begin reciting each mantra for Surya Namaskar mentally as you enter each corresponding pose. The subtle vibration and rhythm of chanting help regulate your breathing rate, prevent you from rushing through movements, and transform an ordinary physical session into a deeply calming moving meditation.
Using a solar mantra for surya namaskar turns your morning workout into a structured ritual that anchors your attention, keeping your mind from wandering off to your daily to-do list.
How Many Surya Namaskar Should You Do a Day?
This is easily one of the most common dilemmas my beginner students face. You might hear online fitness influencers boast about completing 108 rounds every morning, but attempting that kind of volume as a beginner is a guaranteed recipe for extreme muscle soreness, tendon irritation, or burnout.
When building physical endurance, progressive overload applies just as much to yoga as it does to weight training. Here is the beginner-friendly progression framework we recommend at iFitGuide:
- Week 1 – Week 2 (Building the Foundation): Perform 2 to 4 rounds per day. Focus purely on learning correct posture mechanics, proper foot positioning, and breathing coordination. Keep your pace slow and controlled.
- Week 3 – Week 4 (Developing Stamina): Increase your volume to 6 to 8 rounds per day. You will start noticing improvements in your shoulder strength, core stability, and overall breathing capacity.
- Month 2 and Beyond (Consistency & Volume): Gradually work your way up to 12 rounds per day. Completing 12 full rounds (which equals 24 individual sets, alternating right and left legs) takes approximately 12 to 15 minutes and serves as an exceptional daily maintenance routine for life.
I always tell my clients at iFitGuide: Quality beats quantity every single time. Doing 4 slow, meticulously aligned rounds with deep breath control yields vastly superior physical and mental returns than rushing through 20 sloppy, uncoordinated rounds where you compromise joint safety.
Best Time to Practice Surya Namaskar
While you can technically practice at various times throughout the day, traditional wisdom and modern exercise physiology both point to early morning—around sunrise—as the optimal window.
Practicing early in the morning on an empty stomach offers distinct advantages:
- Metabolic Ignition: Moving your body first thing in the morning kicks your sluggish metabolism into gear, elevating your basal heart rate and spurring calorie consumption for hours afterward.
- Spinal Decompression: After lying flat in bed for 7 to 8 hours, your spinal discs are fully hydrated and somewhat stiff. Moving through gentle backbends and forward folds decompresses your vertebral column and restores joint fluid circulation.
- Consistency: Morning routines are far less likely to be disrupted by last-minute work meetings, family obligations, or evening social events.
If you are incorporating this practice into a targeted weight loss routine, combining your morning practice with other effective morning workouts for weight loss creates a disciplined, energizing habit that sets a positive health tone for your entire day.
What if your work schedule makes morning sessions impossible? Do not worry—practicing in the late afternoon or early evening is perfectly acceptable too! The key rule to remember is stomach fullness: always ensure a gap of at least 3 to 4 hours after a heavy meal or 1.5 to 2 hours after a light snack before stepping onto your mat. Practicing forward folds and abdominal inversions with a full stomach causes acid reflux, indigestion, and sluggish movement performance.
Common Mistakes Beginners Make
In my 12 years of coaching, I have observed the exact same technical errors trip up new practitioners time and time again. By learning to identify and correct these mistakes early, you will protect your joints from unnecessary wear and tear and maximize the efficiency of every session.
Here are the top five beginner blunders to watch out for:
- 1. Holding Your Breath: When movements get physically challenging—like holding Plank Pose (Dandasana) or lowering into Eight-Limbed Pose (Ashtanga Namaskara)—beginners frequently hold their breath involuntarily. This creates sudden spikes in intra-thoracic blood pressure and causes rapid physical fatigue. If you forget the exact breath coordination, just focus on keeping your breathing continuous, deep, and smooth through your nose.
- 2. Sagging Lower Back in Plank: When transitioning through Step 5, weak core engagement causes the pelvis to collapse downward toward the mat. This places severe compressional stress on your lumbar spine. Keep your core tight, squeeze your glutes, and maintain a straight line from your head to your heels.
- 3. Flaring Elbows Outward: During Ashtanga Namaskara (Step 6) and Cobra Pose (Step 7), beginners often flare their elbows wide out to the sides like bird wings. This puts your shoulder joints into a compromised, unstable position. Keep your elbows tucked in tightly against your ribs throughout the transition.
- 4. Forcing Hamstrings in Forward Bends: Forcing your knees completely locked straight while trying to touch the floor in Uttanasana causes rounding in your lower back and risks hamstring attachment tears. Always prioritize a flat back over straight legs. Bend your knees as much as necessary so your hands can touch the floor or rest comfortably on yoga blocks.
- 5. Rushing Through Transitions: Yoga is not a competitive sport. Jerking your body violently from one posture to another bypasses muscle engagement and relies on joint momentum, inviting injury. Focus on controlled, fluid, and deliberate movement transitions.
To review the basics, explore the Verywell Fit guide to beginner yoga fundamentals for practical guidance on foundational poses, breathing, balance, and building a consistent yoga practice.
FAQ Section
Is surya namaskar good for weight loss?
Yes, it is highly effective for weight loss when practiced regularly at a steady, dynamic pace. A brisk 20-minute session can burn anywhere between 150 and 230 calories depending on your body weight, intensity, and movement cadence.
Because it engages every major muscle group—including your core, legs, back, and shoulders—it helps build lean muscle tissue while burning stored fat. For optimal weight management results, combine your daily yoga practice with a clean, calorie-controlled diet and regular cardiovascular activity like brisk walking or swimming.
Can surya namaskar reduce belly fat?
While targeted spot reduction of body fat is physically impossible (your body burns fat systemically across your entire body), this flow directly strengthens and tones the underlying abdominal muscles.
Positions like Plank Pose (Dandasana), Cobra Pose (Bhujangasana), and Standing Forward Bend (Uttanasana) deeply engage your rectus abdominis, transverse abdominis, and obliques. Additionally, the alternating compression and extension of your abdomen stimulates digestive functioning, which helps reduce abdominal bloating and gives your midsection a flatter, tighter appearance over time. If your goal is to lose belly fat at home, adding 8 to 12 rounds to your daily exercise plan provides excellent structural core conditioning.
Does surya namaskar increase height?
In fully grown adults whose skeletal growth plates (epiphyseal plates) have fused—typically around age 18 to 21—no exercise can physically lengthen long bones to increase height.
However, practicing this sequence dramatically improves your posture. Most people slump forward due to tight chest muscles, weak upper back muscles, and rounded shoulders, which can make them appear 1 to 2 inches shorter than they actually are. The systematic decompression of your spinal column, stretching of tight hip flexors, and strengthening of postural back muscles help you stand fully upright, immediately optimizing your natural stature and confidence.
How many calories does surya namaskar burn?
On average, performing one full round of Sun Salutation takes approximately 1 to 1.5 minutes and burns roughly 10 to 15 calories, depending on your current body mass, muscle efficiency, and exercise tempo.
If you complete a standard beginner-to-intermediate routine of 12 full rounds in 15 to 18 minutes, you can expect to burn approximately 120 to 180 calories. Performing the sequence at a faster, continuous tempo increases cardiovascular demand and elevates total calorie expenditure further.
Can I do surya namaskar during periods?
This depends entirely on your personal comfort levels, menstrual flow, and individual body response. Generally, gentle yoga practice during menstruation can help relieve painful uterine cramps, reduce lower back stiffness, and ease mood swings.
However, during heavy flow days, traditional yoga guidelines recommend avoiding intense dynamic flows or heavy backbending and inversions (like Downward-Facing Dog) that place pressure on the pelvic region. If you feel low on energy, opt for gentle static stretching, restorative yoga postures, and deep breathing exercises instead, returning to your regular sequence once your flow lightens.
Final Thoughts for Beginners
Starting a new fitness journey can feel intimidating, but taking care of your body does not require complicated equipment or dramatic lifestyle overhauls. The true beauty of surya namaskar yoga lies in its simplicity, accessibility, and time-tested efficacy.
Whether you have 10 minutes or 30 minutes to spare in the morning, stepping onto your mat and completing a few mindful rounds will leave you feeling stronger, more flexible, and mentally focused to tackle whatever your day holds.
Here at iFitGuide, our core philosophy is rooted in long-term consistency over short-lived intensity. Do not worry about achieving picture-perfect postures or hitting high rep counts on your first day. Focus on listening to your body, respecting your current physical limitations, and celebrating incremental progress. With patience, gentle persistence, and proper technique, the physical and mental surya namaskar benefits will unfold naturally in your daily life.
Grab your yoga mat, take a deep breath, and begin your first round today—your body and mind will thank you for years to come!